
1. Choose the Right Time of Day
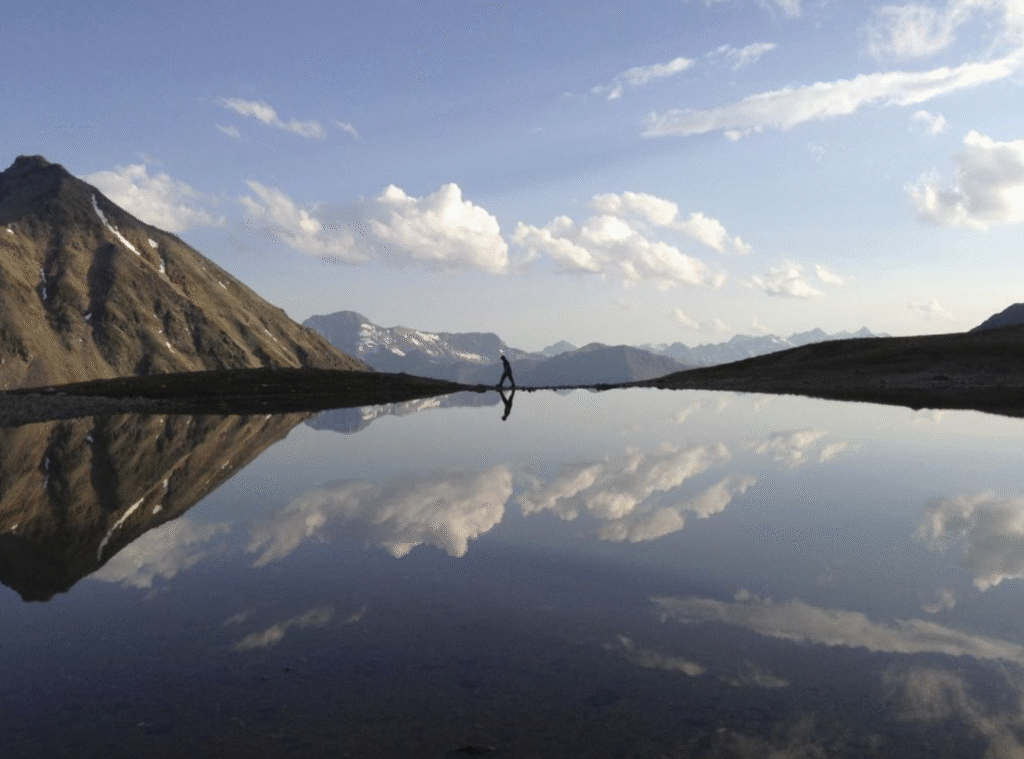
The most compelling landscape shots often come during the golden hours—just after sunrise or just before sunset. At midday, harsh light can generate strong contrasts and flat images, while the soft, angled light of dawn or dusk adds atmosphere and depth. When possible, plan for those early or late hours: assuming a hike or campsite stay gives you enough time to reach an ideal vantage point. In many cases, a smooth lake surface just before sunrise yields perfect reflections—worth the effort of waking early or staying overnight uphill. That said, daylight shots can still work, especially if you moderate contrast and shadows in post-processing.
2. Introduce Dynamic Composition
Look for layers and foreground elements to create visual depth in your image. Whether it’s an out-of-focus branch, a tent in the foreground, or a dramatic sky, varying levels enrich your composition. Don’t feel constrained by traditional “rule of thirds” thinking—sometimes placing the horizon centrally offers powerful symmetry, especially with reflections. Leading lines such as paths, ridgelines or streams help guide viewers’ eyes through the frame, adding structure and movement to the scene.
3. Master Aperture and Shutter-Speed Choices
For landscapes where you want everything sharp—from foreground to background—choose a narrower aperture (for example, f/10 or smaller). If you want to introduce a soft, blurred foreground, then a wider aperture (f/4 or more) works better. Basically: wider aperture = less depth of field; smaller aperture = greater depth. Experimentation helps: try different settings and evaluate the results on a computer to decide what you like best.
4. Shoot in RAW Format & Use Auto White Balance
By capturing images in RAW format, you preserve maximum detail and flexibility during editing—particularly important when you’re dealing with changing light or dramatic skies. Setting your camera’s white balance to “auto” is practical when conditions are shifting, and minor colour adjustments can easily be handled in post-production. The RAW workflow gives you greater control over exposure, contrast, highlights and colour fidelity.
5. Use a Tripod—Your Most Important Tool
When light is low (twilight, dusk, or night) a tripod becomes essential. I always carry one when travelling, especially when shooting long exposures or astrophotography. If you forget a tripod, improvisation works: I once rested my camera on a stone wall for a sunset shot and it still worked beautifully. For lighter use, a small travel tripod or even a flexible Gorillapod may suffice—but think wind, stability and your lens weight carefully.
6. Embrace Weather & Atmosphere
“Bad” weather can often yield better scenery than blue skies. Dramatic lighting after rain showers, low-lying mist, fog drifting through woods, or snowfall can all transform a landscape into something atmospheric and unique. If the light is flat and the sky bland, you may still create something memorable by embracing the moment rather than waiting for perfect conditions.
7. Explore Night & Astrophotography
Night shooting takes things to the next level. A full-frame camera, sturdy tripod and wide-angle lens are favourites. When photographing stars, aim for locations with minimal light-pollution and try timing with a moonless sky to help the stars stand out. For combining foreground features with the starry sky, you can shoot multiple exposures with different settings and merge them in editing. Or try light-painting: using a torch during long exposure to subtly illuminate an element in the scene for creative effect.
8. Plan Ahead—but Stay Flexible
Research your location in advance: Google Maps, Instagram hashtags, and photo portfolios are great resources to understand viewpoint, lighting and mood. Still, spontaneity has value—especially when you revisit a location at different times of day or in varying weather. Even returning to the same tree or vantage point over a year can yield an extraordinary series of images. The mix of planning and serendipity is often where the magic happens.
9. Experiment with Multiple Lenses
Landscape photography is not limited to wide-angle lenses. A telephoto lens (70-200 mm, for example) allows you to isolate details, compress space, and create a different feel. With such lenses you can tease out textures and play with depth-of-field: keep foreground sharp and background soft, or vice versa. A fixed-focal lens (e.g., 55 mm f/1.8) also adds versatility, especially if you combine landscape with travel or portrait elements on the same trip. Having a range of lenses enhances creative freedom.
10. Highlight Texture & Detail
Nature offers endless textures: water ripples, rock faces, moss, branches, snow. Zoom in on these and you may find abstract compositions that challenge the viewer’s perception—what are they really looking at? Macro and telephoto lenses help pick out these details. Texture adds mood and enriches even a simple landscape scene.
By keeping these ten pointers in mind, you’ll build both technical control and creative vision—skills that help you rise beyond “just another pretty landscape” and capture images that reflect atmosphere, uniqueness and personal style.

